Trikdis FLEXi Keypad SK-LCD button – Guía rápida de usuario
- 01.07.2025
- Manufacturer: Trikdis


Descripción de funciones
- Date
- Time
- Area Status Indication
- Area Control Buttons
- Menu Button
Alarm System (Away) ARMING
- Make sure no zones are violated.
- Pulse [

 ].
]. - Enter your user code.
- Seleccione el área.
- Pulse [
 ].
]. - Leave the area within the exit delay time.
When the system is armed, the  icon appears on the display.
Alarm System DISARMING
- Enter your user code.
- Seleccione el área.
- Pulse [].
When the system is disarmed, the  icon appears on the display.
Modo NOCHE / REPOSO
The building's perimeter is secured, free movement inside is allowed. Alarms upon door/window opening.
- Pulse [
 ].
]. - Enter your user code.
- Seleccione el área.
- Pulse [].
- NIGHT arming activates immediately.
The  icon appears on the display when NIGHT arming is active.
Modo STAY (En casa)
There is an entry delay. Free movement inside is allowed.
- Pulse [
 ].
]. - Enter your user code.
- Seleccione el área.
- Pulse [].
- STAY arming activates immediately.
The  icon appears on the display when STAY arming is active.
To change the area status, simply enter the user code and select the desired area. To clear entered commands, press the [ ].
].
Adding a new code / Modifying an existing one:
- Pulse [
 ], then the [0].
 - Introduzca el código maestro (por defecto: 1234).
- Enter the two-digit serial number of the user (e.g., 02).
- Introduzca el nuevo código dos veces.
- Select the areas assigned to the user.
- Pulse [].
To exit, press the [] button again.
Nota
- Master code serial number: [01]
- Codes consist of 4 digits.
Deleting a user code:
- Pulse [], then the [0].
- Introduzca el código maestro.
- Enter the two-digit serial number of the user (e.g., 02).
- Pulse []. (A confirmation sound will be heard.)
- Pulse [].
To exit, press the [] button again.
Activar la inhibición:
- Pulse [], then the [6].
- Enter your user code.
- Introduzca el número(s) de dos dígitos de la(s) zona(s). Puede introducir varios, p. ej. 05 y luego 11.
- Pulse []. ( aparece en la pantalla si hay una zona inhibida.)
Desactivar la inhibición:
Repita los pasos de activación.
Enviar una señal de emergencia:
- Policía – mantenga pulsado el botón [1] durante 3 segundos
- Emergencia médica Aid – mantenga pulsado el botón [4] durante 3 segundos
- Bomberos – mantenga pulsado el botón [7] durante 3 segundos
Nota: Solo funciona con una suscripción activa de supervisión remota.
Restablecer los detectores de incendio (humo):
- Pulse [] button for 3 seconds.
Nota: Los detectores de incendio y/o humo no se restablecen automáticamente tras una alarma. Deben restablecerse manualmente.
Button Brightness
- Pulse [], then buttons [5] and [3].
- Adjust the brightness with buttons [2] / [8].
- To save [], to exit [].
LCD Display Brightness
- Pulse [], then buttons [5] and [2].
- Adjust the brightness with buttons [2] / [8].
- To save [], to exit [].
Keypad Volume
- Pulse [], then buttons [5] and [1].
- Adjust the volume with buttons [2] / [8].
- To save [], to exit [].
Disabling Standby Light
This setting controls whether the keypad backlight illuminates even when the device enters standby mode (i.e., has not been pressed for a while).
- Pulse [], then buttons [5] and [4].
- By pressing button [1], you can set the backlight to illuminate in standby mode, while with button [2], you can set it to turn off.
- To save [], to exit [].


El teclado "SK-LED button" gestiona 64 zonas y 8 áreas. Las áreas pueden asignarse a teclados individuales. Disponible desde FW:SP3_xxx4_0121 de la central.
Tags:
Related Articles
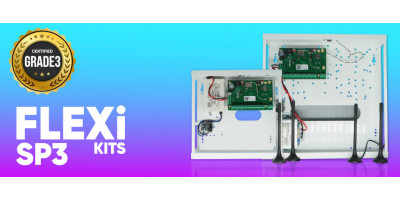
Presentamos el FLEXi SP3 – la mejor central de alarma inteligente de Trikdis
- 10.08.2020
Introducing the Trikdis FLEXi SP3 smart alarm control panel: integrated WiFi+Ethernet/2G/4G communicator, easy replacement, cost-effectiveness and smart home features.
Read More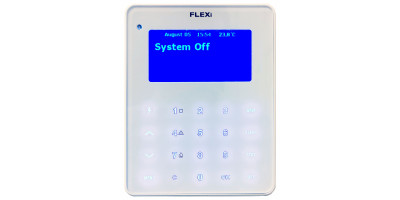
Proceso de actualización de firmware del teclado FLEXi LCD
- 06.03.2023
Guía paso a paso para actualizar el firmware del teclado Trikdis FLEXi LCD para la central de alarma FLEXi SP3.
Read More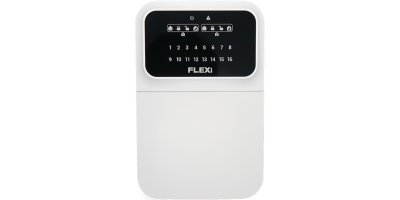
Trikdis FLEXi Keypad SK-LED button – Guía rápida de usuario
- 10.07.2025
Guía rápida para el teclado Trikdis FLEXi SK-LED button: activación, desactivación, gestión de códigos, inhibición de zonas y funciones de emergencia.
Read More

